Troubleshooting
This chapter contains a step-by-step instructions on how to gather information for troubleshooting:
Gathering Detailed Logs
Low level logs might not contain all information required to resolve the issue. In these cases, it might be necessary to troubleshoot with more detailed logs. In this case MSP360 Support Team representative can ask you to send logs with High/Debug log level.
Change Logging Level in Management Console
This method is intended for providers only.
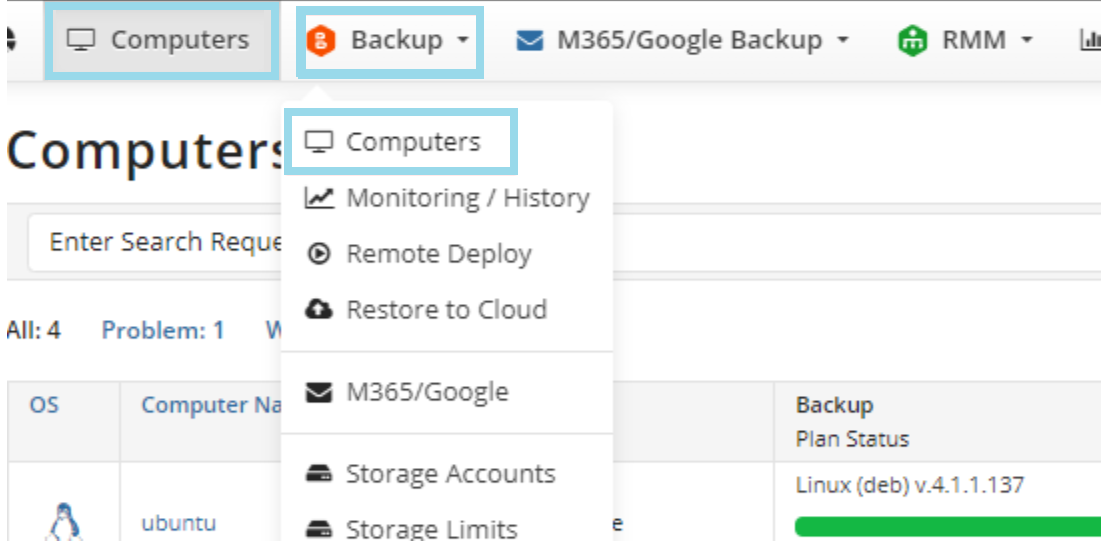
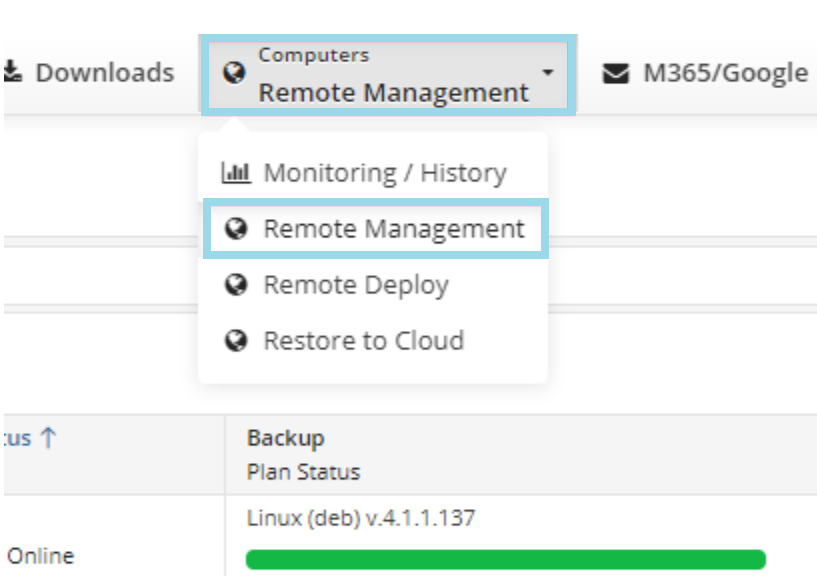
- In the Management Console, select Computers or Backup > Computers tab (Or Computers > Remote Management tab if you are using the classic user experience).
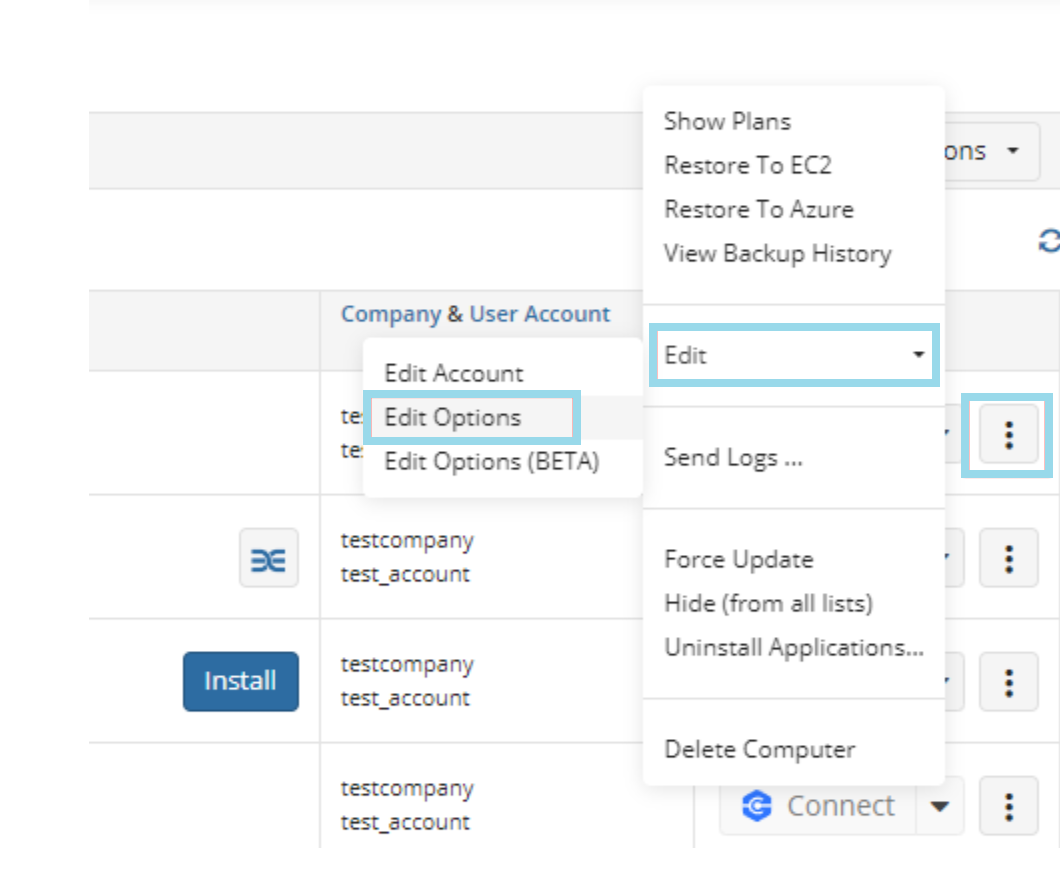
- Expand action menu (three dots) next to the computer you want to change logging level for, then select Edit > Edit Options.
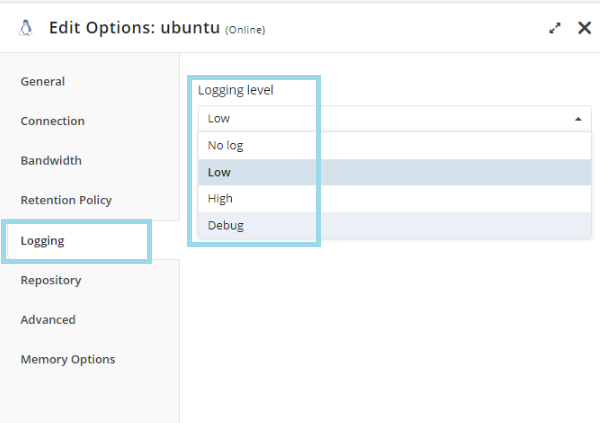
- Open Logging tab, then select logging level
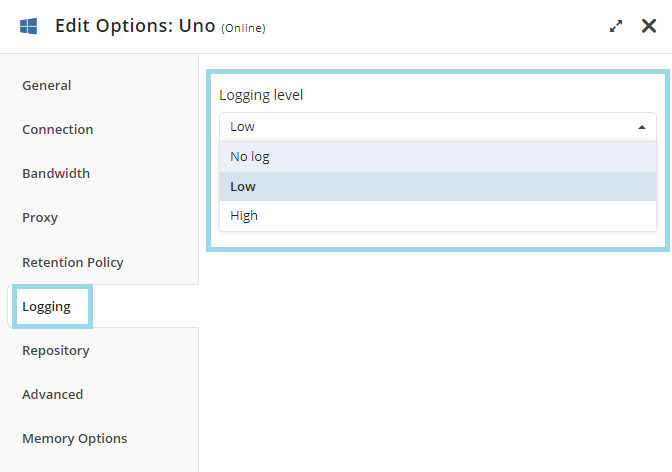
Available settings depend on the operating system of the computer
Change Logging level with Backup Agent
Using Backup Agent GUI
- Open Managed Backup Agent.
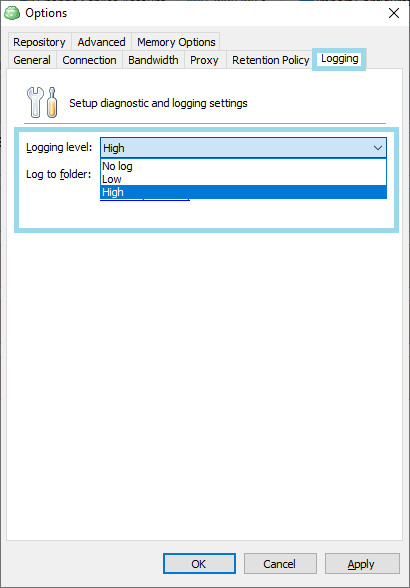
- Click Tools > Options.

- Select Logging tab.
- Change logging level.
Linux and macOS
Using Backup Agent GUI
- Open Managed Backup Agent.
- Click Settings.

- Select Advanced tab.
- Change logging level under Logging > Mode.

Change Logging level Using Command Line Interface
You can use these commands in Terminal to change the logging level. Note that commands vary depending on the system you use (Linux/MacOS), product version and product name. You also need to specify whether you need high or debug level logs using the parameter High or Debug.
For Linux "/opt/local/Online Backup/bin/cbb" option -set logging -mode High You might need to change Online Backup to the name of your Backup package.
For macOS: "/Applications/Online Backup.app/Contents/MacOS/cbb" option -set logging -mode High You might need to change Online Backup to the name of your Backup package.
Creating Dump File
The following instructions were written for the Windows 10 and could slightly differ for other Windows releases.
Please follow steps below to create and send dump files:
Encounter (or reproduce, if necessary) the issue with backup (or restore) plan freezing. This is critical to create a dump file right at the moment you are experiencing the issue.
Start Windows Task Manager. To do this, use one of the following methods:
- Right-click an empty area of the taskbar, and then click Task Manager.
- Press CTRL+SHIFT+ESC.
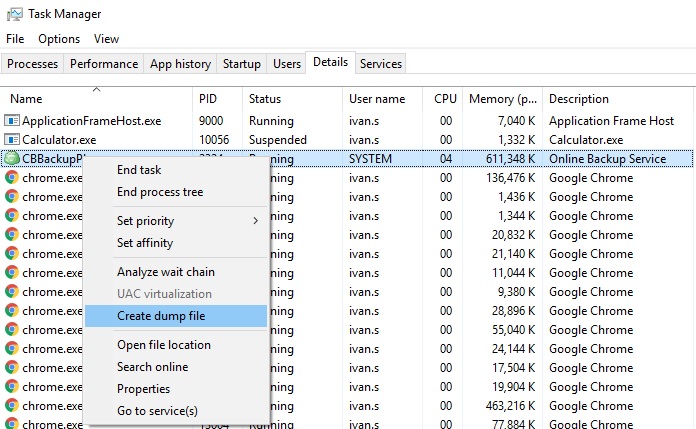
- Switch to Details tab, and then find the name of the process you need.

In most cases, name of the process contains the name of a program you are using. CloudBerry Backup starts processes named CBBackupPlan.exe for each running backup plan task. And if a plan backup freezes, it could be useful to investigate a pair of dump files for the appropriate CBBackupPlan.exe process.
- Right-click on the required CBBackupPlan.exe process and click Create Dump File:
If you are prompted for a Windows administrator password or confirmation, type the password and click "Continue".
The dumping process can take some time to generate a file. Once it's completed you will see a pop-up window with the path to a generated dump file.
- After waiting for 3-5 minutes, repeat step 4 again, thus creating a second process dump.
It's often useful to have at least two dumps in order to study dynamic properties of the issue within the affected process.
- After the dump files are created, open Windows Explorer and navigate to the folder specified in the Dumping Process dialog in order to access the resulting (".dmp") files:
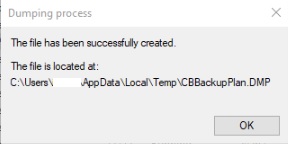
By default, Windows operating system stores created dump files in "C:\Users{UserName}\AppData\Local\Temp" folder.
If you cannot find the folder AppData, you might need to enable the option to show "Hidden files and folders" in your Windows Explorer "View" settings.
- Compress the created ".dmp" files as ".zip" or ".rar" archive, and send it to us at [support team]/contact-us/technical-support), or provide it in a support case where the dumps were requested for invesitagive purposes.
To upload the archive file with collectced dumps, you can also utilize the following commands for elevated Windows CMD:
chdir "BackupSoftwareInstallationDirectory"
.\cbb.exe sendFileToSupport -p "PathToArchiveFileWithDumps" -t EIGHT_DIGIT_SUPPORT_CASE_NUMBER