How to Create a Dump File for Troubleshooting Purposes
Situation
The support engineer asks you to create a dump file or send the created dump file to resolve your issue.
While running a backup, the backup plan could freeze. There are several reasons for this behavior and, in most cases, examining Backup software log files helps to localize the cause and find a solution quickly.
However, sometimes the logs are not informative enough and additional details might be needed for further investigation.
The dump file of a process responsible for the backup plan operation should contain the required details. Creating dump files allows you to save the detailed information on the application's state, which could be very helpful for issue debugging.
Solution
The following instructions were written for Windows 10 and could slightly differ for other Windows releases.
Please follow the steps below to create and send dump files:
Encounter (or reproduce, if necessary) the issue with backup (or restore) plan freezing. This is critical to create a dump file right at the moment you are experiencing the issue.
Start Windows Task Manager. To do this, use one of the following methods:
- Right-click an empty area of the taskbar, and then click Task Manager.
- Press CTRL+SHIFT+ESC.
- Switch to the Details tab, and then find the name of the process you need.
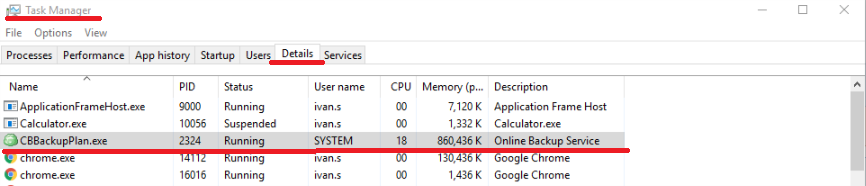
In most cases, the name of the process contains the name of a program you are using. CloudBerry Backup starts processes named CBBackupPlan.exe for each running backup plan task. And if a plan backup freezes, it could be useful to investigate a pair of dump files for the appropriate CBBackupPlan.exe process.
- Right-click on the required CBBackupPlan.exe process and click Create Dump File:
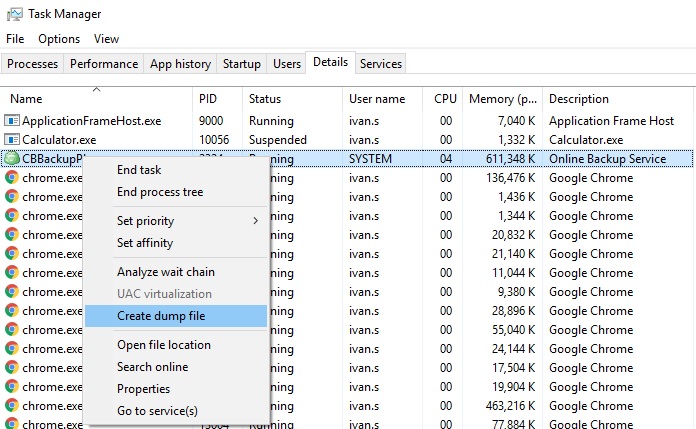
If you are prompted for a Windows administrator password or confirmation, type the password and click "Continue".
The dumping process can take some time to generate a file. Once it's completed, you will see a pop-up window with the path to a generated dump file.
- After waiting for 3–5 minutes, repeat step 4 again, thus creating a second process dump.
It's often useful to have at least two dumps in order to study dynamic properties of the issue within the affected process.
- After the dump files are created, open Windows Explorer and navigate to the folder specified in the Dumping Process dialog in order to access the resulting (".dmp") files:
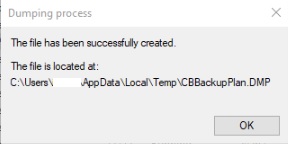
By default, Windows operating system stores created dump files in "C:\Users{UserName}\AppData\Local\Temp" folder.
If you cannot find the folder AppData, you might need to enable the option to show "Hidden files and folders" in your Windows Explorer "View" settings.
- Compress the created ".dmp" files as ".zip" or ".rar" archive, and send it to us at support@msp360.com, or provide it in a support case where the dumps were requested for investigative purposes.
To upload the archive file with collected dumps, you can also utilize the following commands for elevated Windows CMD:
chdir "BackupSoftwareInstallationDirectory"
.\cbb.exe sendFileToSupport -p "PathToArchiveFileWithDumps" -t EIGHT_DIGIT_SUPPORT_CASE_NUMBER
Contact Us
In case of you have any questions, you can contact us.